Another fabulous post from Joanna this month.
Gratitude Journal Made With Recycled Materials
By Joanna Grant
Hello again, artsy friends! My submission for this season is another
simple little art journal made with recycled materials and with a gratitude
theme. It seemed appropriate considering
Thanksgiving here in Canada
is the second weekend of October, right about the time you’ll be reading this
post.
I decided to do a small, modular journal, one that
would be easy to add more sentiments to as one wishes. Again, I raided my stash of salvaged office
supplies in the hopes of using up some more of that stuff.
I started with two small envelopes which would be the
covers of the little journal. They each
measure 3.25” X 6” and I treated them with a variety of paint techniques. Colors for this project include brown, red,
orange and mustard yellow.

Using an old credit card I swiped acrylic paint around
(in red, orange and yellow ochre) for the first layer (both sides of each
envelope). When the paint was dry, I
took a brown stamp pad and smeared it all over both sides. Notice my fancy terminology for these techniques
– “swipe” and “smear.” The next layer
was a crackle pattern rubber stamp in brown, followed by all the colors used
with various sized spouncers for the dots.

At this point, I focused on one side of the envelopes
which would be the inside of the front and back covers of the journal. I chose the seam side of the envelopes to be
the inside of the covers. Using some
recycled acetate from my office supply stash, I went online and found a generic
image of teasel (to fit this month’s theme) and printed a variety of sizes on a
single sheet of acetate on my laser printer. (My apologies to Joanna, I forgot to tell her about the change to Cow Parsley - however I think it's great to have something different!)

After cutting out the teasel images, I adhered them to
the envelopes with heavy body gel medium.
The gel medium happened to be a gloss finish, which I don’t normally
like, but it turned out great and the background “swipe and smear” techniques
show through the acetate teasels nicely.

I debated for quite a while whether I should add some
images on top of the teasels but everything I experimented with took away from
the teasels so, for now, I’ll leave the inside covers as they are.
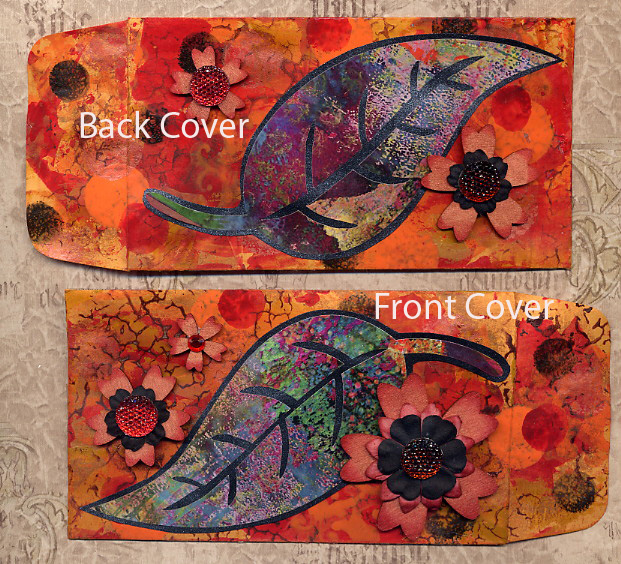
Back on the “outside” sides of the envelopes (the
front and back covers of the journal), I carried on embellishing them with some
large leaves cut from some of my own mono-printed papers, followed by some
wooden flowers painted with copper Twinkling H2Os (shimmery watercolor) and
further embellished with paper flowers and sparkly doodads.

When I was happy (enough) with the envelopes, I
punched a hole in the center of the closed end of each. The journal is held together with a
binder-style ring so that additional pages can be added.

Amongst my salvaged office supplies, I also had an old
box of heavy cardstock divider-type cards.
They came from a library resource center so I am sure they must have
been used to divide card catalogue drawers or something like that. Anyway, I couldn’t let them go to waste so I
brought them home and often use them for tags.
Because they are heavy duty, I figured they would stand up well for this
kind of project, knowing that, as the “pages” of this journal, they will be
handled quite a bit. The photo shows
label on the end of the box of cards and a couple of the blank cards.

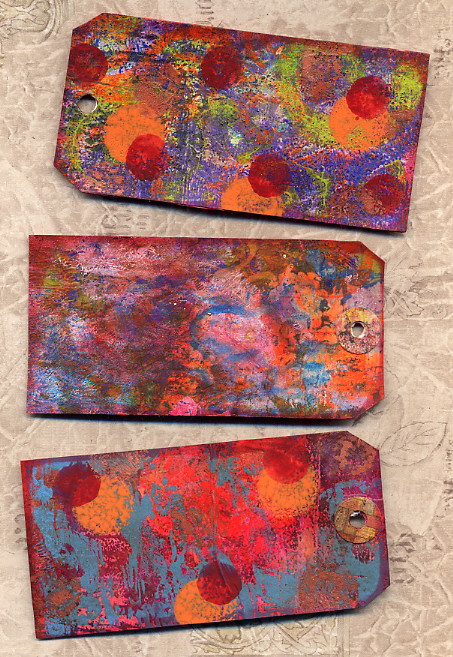
I used the good ol’ “swipe and smear” technique on
several of the cards (both sides, building up layers of acrylic paint.


I also smeared some glitter glue in random spots on
some of the cards for a bit of shine. In
all, I would say each card has about eight layers of paint and/or ink on each
side. I just kept adding to them until I
liked the look.
I punched holes in one end of each so that they could
either go on the ring or have ribbon or fiber attached if they were going to
live in the pocket of the cover envelopes.
Reinforcement stickers went on some of them for added support around the
holes.

Now it was time to consider what sentiments and images
I wanted to include on these cards as the pages of the journal.
On the side of one card, I wrote in lime green
dimensional paint the word “hopeful.”
The ability to be hopeful is something I am personally very grateful
for. It implies something wonderful and
exciting right around the corner.


On the back of “hopeful” I used one of my little slide
mount art pieces I had already made some time ago. I love to alter and embellish recycled slide
mounts and use them as small frames to showcase miniature art. This one has a sweet vintage angel as its
central image. The slide mount is
adhered to the card with white glue. I
did some scribbly journaling that reads, “I am grateful to know the wisdom of
acting with grace in all things.”

To finish this card off, I added some doodly teasels
that were overlaid with a light coat of metallic copper watercolor paint
(Twinkling H2Os).

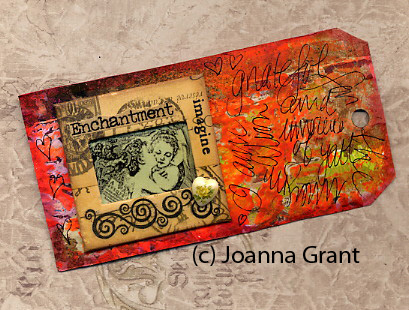
I used the same techniques for another of the cards
that features slide mount art with a sweet pair of cherubs (stamped
images). I did some more scribbly
journaling that reads, “I am grateful for the imagination and innocence of
youth,” and again used the teasel images to finish off this card.

On the next card, I added another slide mount art
piece. Don’t you love the careless,
over-the-shoulder look this vintage lady is giving us? It inspired me to embellish the card with the
words, “irreverence,” “élan,” and “humor,” doodled on washi tape. These are qualities I am grateful to
have. They make life so much easier!


On the flipside of this card I created an homage to
music, with the quote “without music, life would be a mistake”
(Nietzsche). Of all the things in this
life I am grateful for, I think I am most grateful for the gift of music. The flower is another monoprint cutout
embellished with a sparkly doodad. The
lettering is done with a calligraphy pen on scrap paper.

On the last card of this series I used a slide mount
art piece with a vintage image of a cat and the sentiment, “unconditional love,”
that wonderful gift that our pets give us.


In this next image you’ll see two of the other flip
sides, ready to go with additional gratitude sentiments. For the sake of time to get this lesson to
you, I did not finish them, other than to add the monoprint flowers with sparkly
doodads. I am thinking of adding
sentiments about family and health, two other things I am very grateful for.

I may end up attaching funky fibers to some of the
pieces. If I do this, they will live
inside the pockets of the front or back covers. Here’s what they can look like:

I also have four more “pages” on the go (not shown)
which I can add to the journal at a later date.
I like the flexibility of using the binder ring to make this journal
modular. It will be great fun to add to it
over time.

I hope you’ve enjoyed this little project and I
welcome your comments.
Until next time …
Joanna
Thank you so much Joanna for this absolutely gorgeous project.
Don't forget to link up your work using the linky below.
And if you're interested in doing a month long Gratitude Journal challenge in November then have a look here.