A welcome return by Joanna to show us how to make a journal.
Vacation/Travel Art Journal Made With Recycled
Materials
It’s always fun to have a portable art project to take with you when you are travelling. If you’re like me you can’t go very long without doing something creative and the prospect of being on holidays, however fun they are, without a creative outlet is not always something to look forward to. With that in mind, and of course with my eye always on recycling something long-forgotten, here’s a project you’ll find fun.
This time we are recycling old office supplies. Who doesn’t have a bunch of this stuff lying
around, taking up space and collecting dust?
The cool thing about recycling office supplies is that they lend
themselves very well to art journal projects.
Today, we are going to turn old file folders, file hardware, index
cards, library book pockets and other stuff into a beautiful handmade
travel/vacation journal.
Please note that in the photos you’ll see here I am
NOWHERE near completing all the embellishing on the journal I plan to do. I had to stop at some point in order to get
this blog post done! I expect to
continue to add decorative components over time. It was just time to stop all that fun stuff
in order to get the basics of the making of the journal itself outlined here for
you.
So, let’s get started.
Our themes for this month include the dandelion and the colors sky blue
and sunshine yellow, so I’ve incorporated them into this project.
I began with two standard manila file folders for the
covers of the journal. I chose to use
two for added stability. Because this
journal was potentially going to be on the move and subject to some wear and
tear, I figured two folders would be better than one.
I used some of my Adirondack Spray Wash inks in blue tones along with stencils
to coat both sides of both folders. When
dry, I covered all sides with a very light coat of gesso. The spray inks tend to bleed through lightly
applied gesso and that was a look I was deliberately looking for in this
project. I like how the hint of the
blue-toned sprays peeks through the gesso.
And the gesso also gives the folders a bit more substance and
durability.


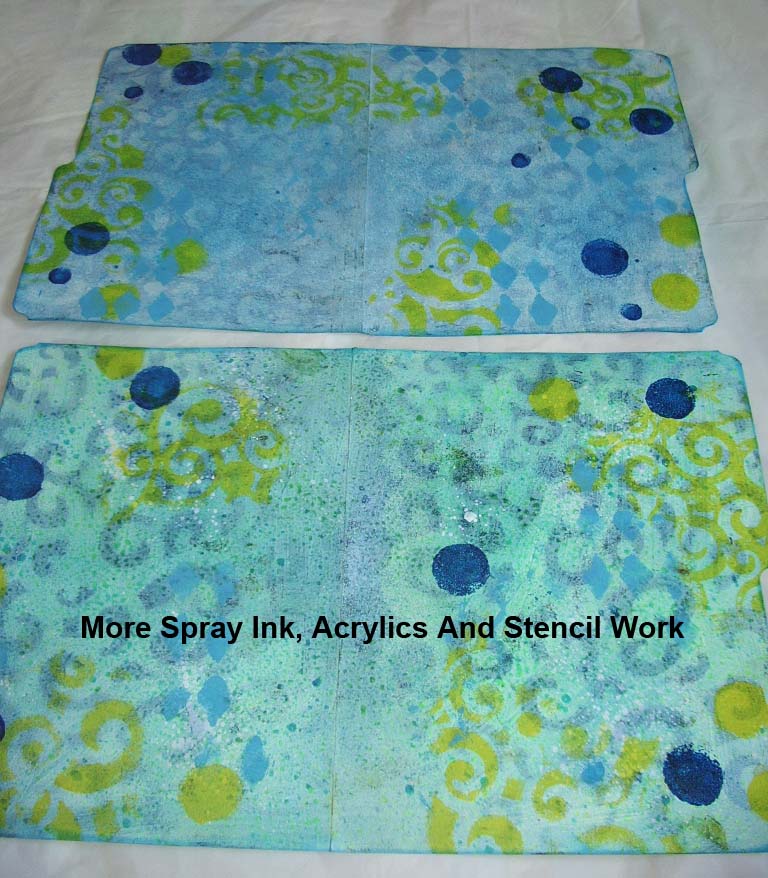
Next I layered on some more spray inks and acrylic
paints with stencils and assorted sizes of sponge spouncers in shades of blue
and yellow.

To fit with our theme, I used a small sunburst-shaped stencil with white acrylic paint to do a stylized dandelion. I then used a permanent black marker to make the stems.


The next few photos show the folders with some more
paint treatment in our theme colors. I
used a white gel pen to add some dimension to the stylized dandelions, and also
used it to make the funky stems. When I
return to the journal to do more decorating and embellishing, I am planning on
turning some of the dots into other funky flowers.

At this point, I decided to stop decorating the
folders (for the sake of time) and started planning out the other elements that
would make up this journal. I knew I
wanted some pockets or envelopes or something that would hold travel mementos,
tickets, photos and other things gathered on one’s travel.
I took a couple of reclaimed library book pockets,
carefully pulled them apart and covered them with a decorative papers (which
happen to be made with those free images from the 12 Months In View April post).
The color of those images worked well with this theme.

I also gathered some index cards, old envelopes, and
some handmade gift bags I’d made a long time ago with reclaimed wallpaper. I thought all of these elements would be
great to incorporate into the journal to hold things.


To hold all of this stuff in place, I decided to use
those two-hole punched file folder hardware thingys. Every office has some of them lying around
unused and I liked the idea that using them would allow for additional pages
and elements to be added to the journal over time. Anything that makes a journal more flexible
to use is a good thing!

So now, I had to plan out where to put the file folder
hardware in relation to the pockets, envelopes, etc. I also wanted to incorporate a couple of
pages of watercolor paper and Bristol
paper so that the journaler would have a variety of surfaces on which to write
or create art with either markers or paints.
I decided that some of the hardware needed to be
placed on the top edge of the journal and that this hardware would hold the
larger sheets of watercolor paper. I
also decided to run some of the hardware close to the center fold of the
journal so that some elements could be held in place horizontally. My thought was that combining both vertical
and horizontal elements in this journal, would make it more interesting
visually.
Using a simple two-hole punch, the file folder
hardware was put into place.

Before adding the pockets and envelopes, I decided I’d
better stick the folders together while it was still fairly simple to handle
them. I measured out and marked the
center fold of both folders as well as 1.5 inches in from the top and bottom
edges of the folders. Then, using an
awl, I poked three holes in each folder.
I then bound the folders together using dark blue embroidery thread,
leaving the ends on the outside of the journal (they will be covered later
on). I have not included binding details
here but you can find all kinds of tutorials online for a variety of bookbinding
techniques for journals.

Now it was time to start adding the pockets, envelopes and papers to the folders. I used the two-hole punch again to make holes in the bottoms of the wallpaper gift bags so that they could hang from the top edges of the folder. They already had holes punched in them on their open end, so a bit of coordinating decorative ribbon works well to hold them closed when they are filled with travel mementos.
On top of one of the envelopes, I mounted a couple of
sheets of Bristol
paper.


Next, on the back inside page, I mounted the recycled envelope that holds the yellow index cards to the bottom of the page with double-sided tape. Several sheets of watercolor paper are mounted over top of the envelope.


On the inside front cover, I added the recycled library book pockets so that they could be a home for some small tags or ticket stubs or other vacation memorabilia. You’ll note that the right-hand page has file hardware mounted to it so that additional elements can be added to the journal.

And that is about it for the basics of putting together the journal. I added some funky checkerboard duct tape to the outside spine to cover up the embroidery thread. I love how that tape coordinates with the stems of the dandelions.
To hold the folders together when travelling, I’ll
adhere some sticky-backed Velcro dots in strategic spots.


Now the best part can start! I can get back to embellishing the journal more with added elements and doodling and who knows what else! Can’t wait!
I hope you’ve enjoyed this project and that it’s given
you some ideas on how to take ordinary office supplies and turn them into a
one-of-a-kind treasured keepsake.
Wishing you an artful day!
Joanna


You can find Joanna here:
Facebook: www.facebook.com/JoannaGrantArt
Etsy store: www.joannabanana.etsy.com
Thank you so much Joanna. I hope you enjoy following Joanna's tutorial and I look forward to see your work linked with the linky below.